
How to Record a Video on a PC
Movavi Screen Recorder is one of the best ways to record videos on a PC:

In this article, we’ll discuss how to record a video on a PC with a few different methods: an online screen recorder, built-in tools, desktop programs, and browser extensions.
Program
Best for
Download
Professional-looking screen and webcam recorded videos
Capturing gaming footage
Screen or webcam video recording online
Capturing screen recordings for PowerPoint presentations
High-quality screen video recording
Screen captures for streaming videos
Capturing part or all of a Chrome browser tab
Recording webcam videos on Windows 10 PCs
Recording and sharing quick webcam videos
Best for: professional-looking screen recorded videos
OS: Windows, macOS
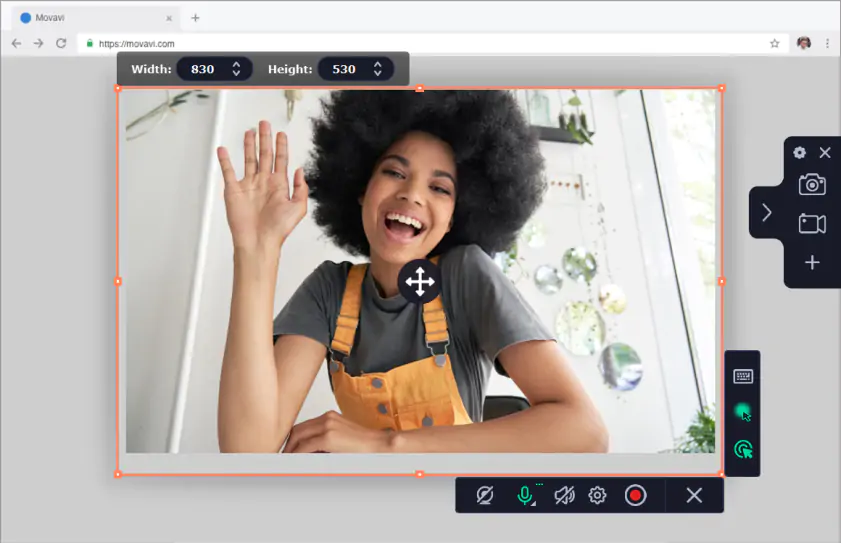
Step 1. Download and open Movavi Screen Recorder
Movavi Screen Recorder offers a free version for your screen capture video needs. Download and open the desktop recorder, and you’ll be prompted to set the area you want to record and adjust your recording settings.
Step 2. Set up your recording parameters
Click the Screen recording button. Movavi Screen Recorder offers intuitive settings to let you select the part of the screen you want to record. You can adjust the height, width, and other settings easily before you hit record.

Step 3. Record video on your PC
Hit the Start recording button to record video with audio from your desktop or laptop. When you’re done, simply hit the square Stop button.

Step 4. Access and edit your video
Along with recording screen videos, Movavi Screen Recorder lets you make edits after recording a video. Press the Cut button to cut the video or click Save current frame to make a screenshot from the video. To save your video, click Export, enter the name of the file, choose the output folder, select the appropriate output format, and finally click Save.

Best for: recording video online without downloading an application to your desktop
OS: online
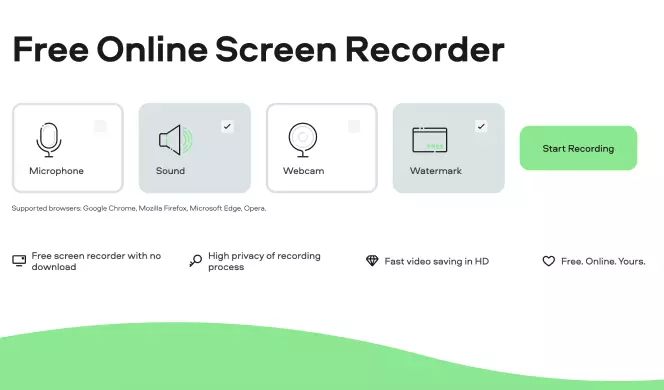
Step 1. Open Screen Capture
Screen Capture is an easy answer to how to record video on a laptop or PC in your browser with no download. You’ll need to ensure that you’re using a browser that supports Screen Capture, so first, open a Chrome, Firefox, Opera, or Microsoft Edge window. Go to Screencapture.com, and click the Start Recording button.

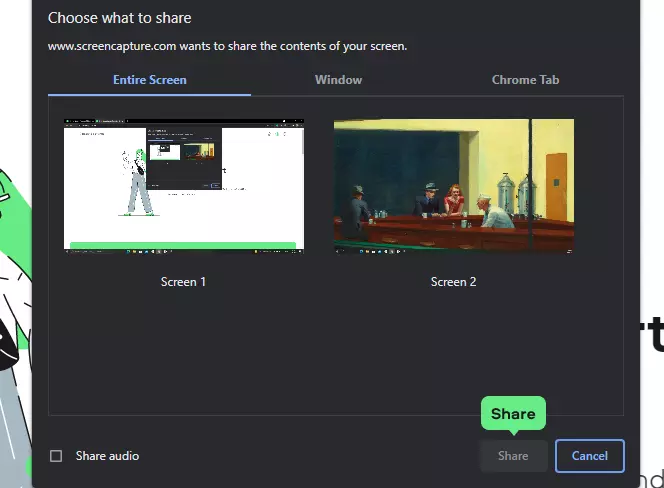
Step 2. Choose what to share
A window will pop up with options to capture your entire PC screen, a single window, or a single Chrome tab. Choose the area you want to record and click Share.
Step 3. Download your recording
When you hit Share, your recording will begin. When you’re finished, hit the green Stop Recording button, and it will take you to a screen to download your recording or start a new one. If you want to change the file format, you’ll need to get the Screen Capture app.

Windows Game Bar
Best for: recording gameplay on a Windows 10 PC and Xbox gaming system
Rating: unknown
OS: Windows
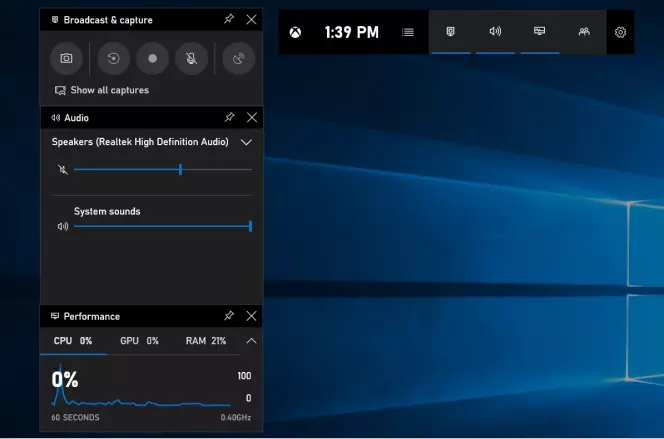
Step 1. Open Windows Game Bar on your PC
Windows Game Bar is a native application to all Windows 10 PCs. You can open it by pressing the Win + G.

Step 2. Start recording
Press the Record from now button to start recording a clip of your screen. You can stop recording at any time by hitting the Stop recording button.
Step 3. Access and edit your video clip
To access your captured video, open the Game Bar again. In the app, go to Show all captures to edit your video.
Included with all Windows 10 PCs Simple screen captures and recordings Interface can be confusing at times Videos don’t always capture correctly Inconsistent recording performanceMicrosoft Office PowerPoint
Best for: capturing screen recordings for PowerPoint presentations
Rating: unknown
OS: Windows, macOS, Android, iOS
Step 1. Open PowerPoint and select a slide
Microsoft Office PowerPoint has a little-known screen recording feature. It’s designed to let users embed videos in slides, but you can also use it to screen record on a computer and save the resulting video for later use.
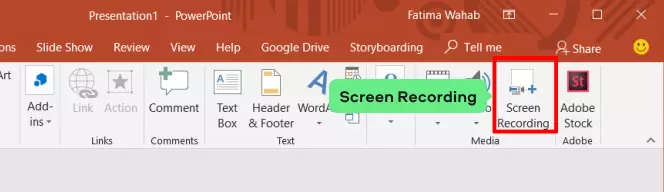
Step 2. Select the recording area
Open the Insert tab and select Screen Recording. This should open options on the Control Dock. Choose Select Area or press the Windows logo key + Shift + A. Then, you can click and drag your mouse over the area that you want to record.
Step 3. Start recording
In the Control Dock, hit Record or press the Windows logo key + Shift + R. PowerPoint will now start capturing a video of the selected area on your screen. You can also control your recording by hitting the pause, record, and stop buttons on the Control Dock at any time. The hotkeys for these commands are:
Step 4. Save your video
PowerPoint automatically saves the videos you record as part of your presentation when you hit the Windows logo key + S, but you can also save your recording as a separate file. Right-click on the image of the recording in the slide and choose Save Media As. Then, just choose a destination and file name, and hit Save.